Heller Austin Mini Special
- Chuck
- Dec 20, 2015
- 2 min read
I normally wouldn't spring for a 1:43 scale kit... swinging the details on the standard old 1:24 and 1:25 stuff can be enough of a pain for me. But this was one case of subject matter trumping all else. Also, I couldn't gripe about the price... not even eight bucks with tax. Since I've been on a bit of a Mini kick of late, it seemed like a perfect kit to snag, despite the fact it's not in a scale consistent with the majority of my collection.
This kit originally appeared in a Heller box in 1979, but was reissued as a Humbrol in 1981. The kit was also released in an Airfix box in 1994 and 1998. It's not as nice as the 1:32 Heller kit (which includes the option of being built as an Austin or as a Morris to boot), but still pretty nice... if you can handle the small size. And I mean this thing is TINY!

The box art is typical Heller- a nicely-done painting depicting the real car in an everyday setting. Also note the British Leyland logo to the left of Austin.

The body is a nice casting- clean and the detail is pretty sharp, even for such a small size. Note that the kit represents a later Mini than the 1:24 Tamiya kits... this kit features the larger rear window, hidden door hinges, and larger, restyled grille of the Mk II and later versions.

Here we have the floor, chassis, interior side panels, front seats, and axle retainers.

Here we have the two-piece tires, front and rear body sections, dash, and interior pieces. Detail on the grille is faint but somehow sharp- mask it during primer and paint, then foil and a black wash should make it pop.

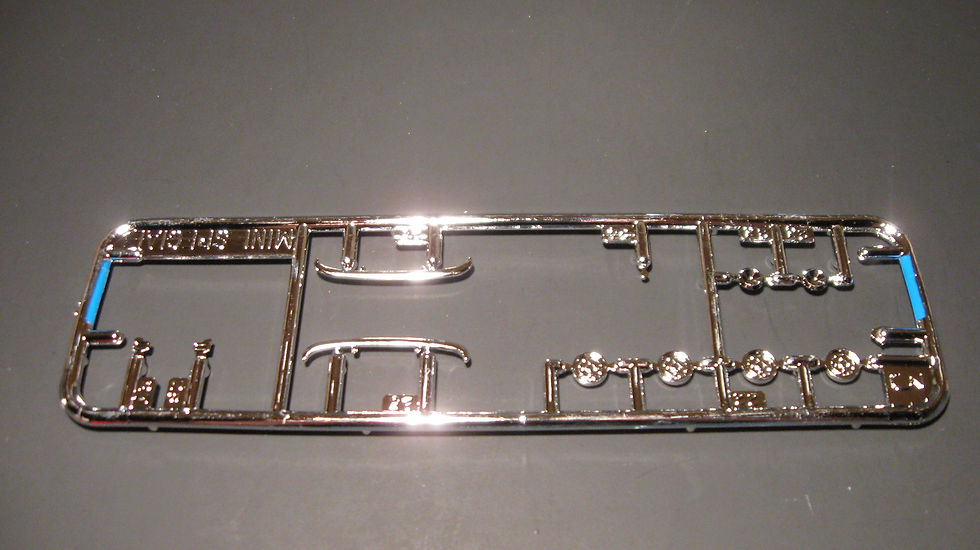
The outer wheels are on the chrome sprue, along with the headlight bezels and bumpers.

The clear parts include separate headlight lenses! Note that one of the side window units is broken off and not shown in the pic.

Not much to the decal sheet... set a quarter over it and it would be almost completely hidden.

Here is the instruction sheet, in it's entirety. Why there is an engine with a sealed hood, I have no idea.

The finished model isn't my finest hour, but it will (hopefully) look better with some more weathering. I will say the parts locked together pretty well, aside from the tire halves, which have no means of positive location. You just need to be careful and butt them together nice and straight. I did it, so you probably can too. I'm not used to 1:43, so messing around with the teeny-tiny parts was a bit much for me. That said, it was a fun little project.
Just for fun, here it is with a pair of 1:24 Tamiya Minis...


Comments